 |  |
 | |
Starting The Game
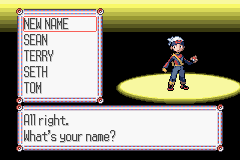 You turn on your game and watch the intro. When you start a new game, you'll see Professor Birch (referred to as Prof. Birch from now on) talking about Pokemon. He's the new professor, and is more of a field researcher than a Pokemon expert like Professor Oak from the previous games. You first choose your gender, and then choose your name. Finally, it's time to play!
Unlike the previous Pokemon games, your adventure doesn't start in your bedroom. Instead, you're in a truck along with a bunch of boxes, bouncing up and down. Soon, you can walk out of the truck. You have arrived at your new home in Little Root Town, a town closely resembling Pallet Town. Your mom talks to you, and leads you into the house. You'll notice that two Machoke (Vigoroth in Emerald) are helping out. Go upstairs and you'll find a clock. Press "A" against it, and then you can set the time by moving the clock's hands by holding down the left or right directional buttons. Go up to your computer and take out the Potion, something you might need later. Go downstairs, and your mom will want you to take a look at the TV. It's an interview with your dad at his gym, but you missed it.
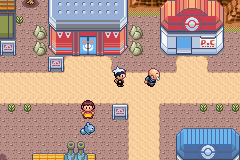
Get out of your house now and go next door to your rival's house. Go upstairs and you'll see your rival. Your rival is the other main character of the other gender. That means if you chose to be a boy, the rival's a girl, and if you're a girl, the rival's a boy. In this walkthrough, we'll refer to the rival as a girl. Talk to her, and she'll will leave. It turns out that Prof. Birch is her dad. You must go through this process, or else a little kid standing near the path won't let you through.
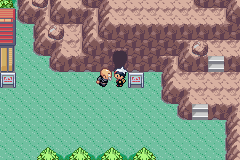
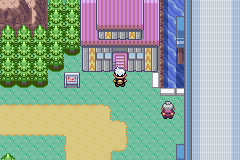
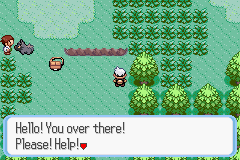 Get out of the house, and go up the path. A Poochyena is chasing Professor Birch in circles. He wants you to choose a Pokemon to fight the dog Pokmeon. Go up to his bag, and you'll be able to choose a Pokemon.
Choose Your Pokemon
 #252: TREECKO (Grass) #252: TREECKO (Grass)The successor of Bulbasaur and Chikorita. Though not as cute as the other two, Treecko is just as good. A grass type lizard can be strong... |
 #255: TORCHIC (Fire/Flying) #255: TORCHIC (Fire/Flying)A flaming little chicken is hot, hot, hot! Choosing this one can burn a hole in your hands, but it can be a great ally. |
 #258: MUDKIP (Water) #258: MUDKIP (Water)This little Pokemon is the one I chose, because I think it's the only good looking starter Pokemon. Its evolved forms look quite muscular and strong, so I would suggest you choose this one. |
After choosing the Pokemon, the Poochyena will battle you. It's a lv. 2 Pokemon, and you have a lv. 5. If you loose this one, well, then you're pretty weak. Anyway, beat Poochyena and the Professor will take you to his lab just below your house. He'll give you the Pokemon that you chose, just to thank you. After that, it's time to go on!
North of Little Root Town is Route 101. Continue upwards. Go through the grass, maybe battle a little with the wild Pokemon to gain levels and experience points. After walking for a very short while, you'll be in the next city.
| Locations (Route 101) |
|---|
|
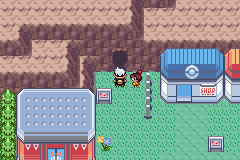
First City
After traveling north, you'll arrive at Oldale Town. It's a small, but peaceful place. Once you enter Oldale Town, you'll notice a person standing between the Pokemon Center and another house. Talk to that person, who turns out to be the PokeMart's store owner, and he'll give you a free Potion. Next, Heal your Pokemon at the Pokemon Center (marked with PC), and go on north to Route 103.
If you've trained your Pokemon already, then go on here (at least lv. 7). If not, go here, battle lv. 6+ wild Pokemon, heal your Pokemon at the Pokemon Center, and head on.
Rival
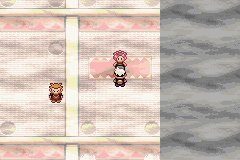
Route 103 is a dead end. At the very end of this route, you'll meet your rival. Talk to your rival, and she'll battle you. She has a lv. 5 Pokemon that has an advantage in type over you. For example, if you use Torchic, she'll use Mudkip. If you trained your Pokemon well, then there's no problem. Beat her, and she'll walk away. Go back toOldale Town, and heal your Pokemon if necessary. Your rival is now at the south end of the city. Talk to her, and she'll go back to Little Root Town.
| Locations (Route 103) |
|---|
|
Good To Be Back
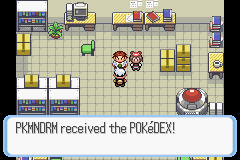
You'll also need to go back to your new hometown. Go to the south of the town, and go into the large labratory of the Professor's. Your rival is there, and so is the Professor. Talk to the Professor, and he'll give you a PokeDex and your rival will give you five PokeBalls. After talking to your rival once again, go outside. There, your mom gives you Running Shoes. Holding down "B" when pressing an arrow button enables you to run. After that, you are free to go explore the world of Hoenn!
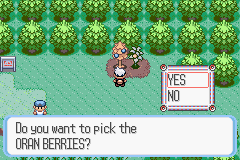
You are now officially starting your journey in the world of Hoenn! Go back to Oldale Town, stock up on some supplies, and go west from there. You'll be on Route 102. You'll have your first trainer battle (not counting the battle with your rival) here. While you're at it, you'll get a look at the new Berry trees, shown on the left. At the south of the route, you'll also find an Itemballwith a Potion inside. Crush all the trainers, gain some levels, catch some Pokemon, and sooner than you think, you'll be atPetalburg City.
| Locations (Route 102) |
|---|
|

First Gym?
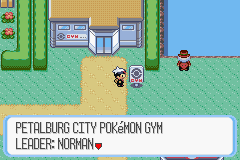 Petalburg City, unlike the previous city, has a gym. You won't be able to battle here, though, since this is supposed to be the fifth gym, and you need to visit the first four gyms to get the first four badges before coming here. After you heal your Pokemon and go to the Mart, you'll want to go on to the next city. But you can't, because a guy stops you from going on toRoute 104.
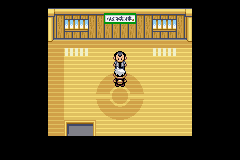
Because of this, you'll have to go into the gym, and talk to the gym leader. He's also your father. A person called Wally comes in, and tells your dad he wants to catch a Pokemon. Your dad gives him a Zigzagoon and a PokeBall, and tells you to make sure that he catches a Pokemon. Now just sit back and enjoy the catching. He'll take you back to the gym, and you have to talk to the gym leader again. After that, leave the gym. Done with that? Go west to the next route. In Emerald, before you can leave, a mysterious guy walks up to you and tells you that he's in search for good trainers.
| Locations (Petalburg City) |
|---|
|
It's time to go on, and the first place you'll be is Route 104. After battling trainers, go north and go inside the Petalburg Woods.
| Locations (Route 104) |
|---|
|
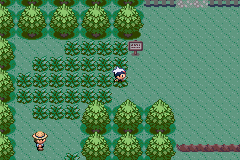 Petalburg Woods seems dark and creepy. Search around for items, battle trainers, or even catch some Pokemon. Go north, and you'll meet up with a member of Team Magma/Team Aqua (from now on, known as Team M/A, depending on the version you have (Magma for Ruby, Aqua for Sapphire.) In Emerald, you'll be fighting a Team Aqua member. Their Pokemon are quite strong, but you'll be able to get through them. After the battle, you'll receive a Great Ball.
If you want to get a hidden item, then once you enter the forest, go east, and you'll see an empty spot in the grass. Go near it, but not in it, and press "A" to obtain the Potion. Exit the forest from the south, and you'll be able to pick up a PokeBall. Finally, go back North, where you'll find another hidden item. There, you'll also find two trees. Come back here after one of your Pokemon learns the Cut HM, cut the trees, and you'll be able to see the rest of the forest. Then, get out of the forest by going north a bit more.
| Locations (Petalburg Woods) |
|---|
|
You're back on Route 104 with more trainers to fight. Talk to the first person you see, and he'll give you TM09 - Bullet Seed. You'll also see a flower shop. Go in there and talk to one of the girls. She'll give you the Wailmer Pail. After planting a Berry, water it with this to make it grow. Behind the flower house is a hidden PokeBall,Super Potion, and a visible Potion. Another item is blocked by a tree at the very east side of the route. Come back later with Cut to obtain the item. On the bridge, you'll be having your first two-on-two battle with the Twins. There's an old lady standing near the water. Talk to her, and she'll give you a Chesto Berry. Head north a little more, and go into the space between the gates and the trees. Keep on going up to pick up a X Defend. You've now arrived at Rustboro City.
Rustboro City
 After going through a long and tiring route, you'll finally arrive at Rustboro City. Here, you'll be able to have your first gym battle. But first, we'll explore the city.
Once you get into the city, go west and you'll see a huge building. Go inside and up to the second floor, and you'll see a little kid and an old man. Talk to the little kid, and he'll give you a Premier Ball. Near the center of the city, there's a Pokemon School. Go inside, talk to the teacher, and he'll give you Quick Claw. You can also learn some important information from the blackboard. In Emerald, go to the lower right-hand side of the school, and you'll see that mysterious person that talked to you back in Petalburg City. His name is Scott, and he's looking for "Pokemon battle experts".
Now for the most important item. There's a house next to the Pokemon Center. Inside, talk to the man, and he'll give youHM01 - Cut, something that's very essential. Teach it to a Pokemon, but remember, it cannot be overwritten (at least for now)! Then, heal your Pokemon, and get ready to rumble, because you're going to the gym!
The Rocky Gym
 North of the city is the gym. If you chose Torchic as your starter, you might have a hard time in this gym, since this is a rock-type gym. Treecko or Mudkip will do great, but don't expect an easy win. You first need to get through two Youngsters with Geodude before getting to the leader. In Emerald, on your second battle, both a Youngster and a Hiker will battle you at the same time. You'll be battling five Geodudes. Heal Pokemon and save game if neccesarry.
It's time to battle the gym leader, Roxanne. She has a lv. 14 Geodude and a lv. 15 Nosepass. In Emerald, she has two lv. 12 Geodude instead of one. The Nosepass is a lot harder to knock out, so be careful! Beat Roxanne and you'll get TM39 - Rock Tomb, and the Stone Badge. It heightens Attack, and now you'll be able to use Cut outside of battle.
Get out of the gym, and a person will talk to you. It's about Team M/A. They've stolen his goods. Heal your Pokemon again, and exit the town by going northeast into Route 116.
 The person will talk to you again. Never mind himp; go on east. You'll go through a ton of trainers and items, not to mention wild Pokemon too. Here, too, a Youngster and Hiker will battle you. From now on, you'll have plenty of these "odd" two-on-two battles. At the end of Route 116 is a cave with an old man and a house with a guy blocking it. Before that, there is a small section of the route with trainers and items inside. Use Cut to get inside.
| Locations (Route 116) |
|---|
|
When you try to get into the cave, the old man will talk to you about his Pokemon getting stolen. After that, go inside. The inside of the cave is totally foggy! Go up for an item, then go east, and you'll find a Team M/A member (Aqua in Emerald). Talk to him, and he'll battle you. After winning, you'll receive the goods, also known as theDevon Goods. The old man will come in to take his Wingull away. You won't be able to continue through the cave, since there are boulders blocking your way. Go outside now, and you'll find the guy blocking the house isn't blocking it anymore. You can go in there now, but there won't be anything to do.
Go back to Rustboro City now. Before you reach there, the same person who talked to you before will talk to you again. He'll give you a Great Ball, lead you into a building, and lead you to the President of Devon Corporation. The President will talk to you, and will give you the PokeNav, short for Pokemon Navigator. This appears in your Menu, and takes the place of the PokeGear (from previous games). Its main function is the map, and it also does other little things. The President will also give you a Letter to hand to a guy named Steven in Dewford Town. After receiving that, you can leave the building. Before you leave, in Emerald, a scientist will stop you and add a Match Call to your PokeNav. It's basically a cellular phone to communicate with trainers you've met before.
Going On
Leave the city by going back south through the forest. In Emerald, your rival will first stop you and register herself in your Match Call, and you'll have a choice of battling her. Once you get into the forest, you can cut the two trees to explore the rest of the forest. There is a girl inside the unexplored part. Talk to her and she'll give youMiracle Seed. There are two Itemballs in the unexplored part and a hidden item in an empty spot in the grass.
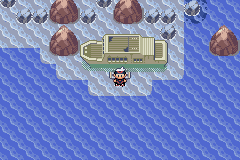
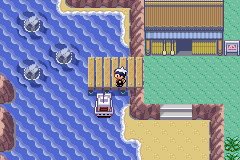 Eventually, you'll reach a small house with a boat floating on the water. Go inside, and you'll find the old man (known as Mr. Briney) and the Wingull you rescued. Talk to him, and he'll take you on his boat to get to Dewford Town.
Town By The Sea
Thanks to Mr. Briney you have come to Dewford Town, where you'll be competing for your second badge. First, there are some things to take care of. Go into the house next to the Pokemon Center, and talk to the guy sitting at the table. He'll give you a Silk Scarf. The Fisherman next to the gym will give you an Old Rod. Fishing in Ruby/Sapphire/Emerald works a bit differently than it used to. Before you get a bite, you can press "A" to quit fishing. However, when you do get a bite and you press "A", there's a chance the Pokemon might get away. If not, you can battle it for a capture. Heal your Pokemon if necessary, and get into the gym.
Fight, Fight, Fight!
 Once you enter the gym, you'll notice everything is dark except for the circle of light around you. The circle gets larger after every trainer that you defeat. It is quite easy to get through this. Just look around, battle a few trainers, and you'll be near the gym leader soon enough.
The gym leader, Brawly, has only two Pokemon. One of them is a lv. 17 Machop, and the other is a lv. 18 Makuhita. In Emerald, he has a lv. 16 Machop, a lv. 16 Meditite, and a lv. 19 Makuhita. Makuhita is quite weird looking, as it looks like a cross between a Pikachu and an Electabuzz. It is harder to beat than Machop and Meditite. Brawly give you TM08 - Bulk Upand a Knuckle Badge for beating him. The badge allows Pokemon up to lv. 30 to obey you. Remember to heal your Pokemon, and leave the town by heading north on Route 106.
 On Route 106, you'll battle two Fisherman. At the end of the route is a cave. Go in there, talk to the guy in front of you, and he'll give you HM05 - Flash. Teach it to one of your Pokemon, and go on into the cave.
| Locations (Dewford Town and Route 106) |
|---|
|
Granite Cave
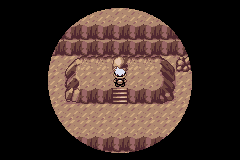 Keep on going westward until you reach the stairs. You must have a Pokemon that knows Flash in order to get through here without any trouble. There is a part of this cave with slippery steps, so you won't be able to go up the steps. The screen shot to the left shows a hidden Everstone in that rock. It'll be a long time until you really get somewhere. At the end of the cave is Steven. Talk to him, and he'll give you TM47 - Steel Wing. Now you can leave the cave and get back to Dewford Town.
| Locations (Granite Cave) |
|---|
|
Talk to Mr. Briney again to get out of the town. Choose the option in the middle, labled "Slateport". He will once again take you on a boat ride. The boat ride will take you directly to Route 109, but if you surf there, you'll discover better things.
 If you chose to surf to land on Route 109 (which you cannot do at the moment), you'll find an Abandoned Ship in the middle ofRoute 108. This Abandoned Ship not only has trainers, but also items. Look around, and you'll find: Dive Ball, Revive,Harbor Mail. You'll also find a Storage Key. To use the Storage Key, go to the area where the Tuber and Sailor are standing. Put the key in the door above the Sailor, and the door will open. Inside is TM31 - Brick Break. Now you can go on east towards land.
Finally, you'll reach Route 109. Once you get off, talk to the girl who is in the sand with the boy. She'll give you Soft Sand. Go into the Seashore House, battle all three trainers, and talk to the man at the very top of the screen. He'll give you six Soda Pops for battling. Battle more trainers to have fun and gain experience, and soon, you'll arrive at Slateport City.
| Locations (Route 107, 108, and 109) |
|---|
|
| Locations (Abandoned Ship) |
|---|
|
A Huge City
 Slateport City is huge, but doesn't have a gym. Still, you have a lot to take care of here. In Pokemon Emerald, go to the medicine shops on the left and talk to the lady at the very top. She'll give you a Powder Jar to hold crushed Berries. She can make medicine out of this. You can go to the Name Rater in the house west of the Pokemon Center (shown on the left) and change one of your Pokemon's names. Or you can buy a few things in the open air market. But those aren't important too important.
In Emerald, at the very north-west corner of the city, you'll find a Battle Tent. Here, you choose three rental Pokemon to fight other trainers, and in the end, you win a fine prize.
Getting Rid of the Team
What is important is that a group of Team M/A members have blocked the city's museum and Route 110. In the city, you'll notice a large ship-building factory. Go in there, and talk to the balding guy on the first floor who's wearing quite different clothes from everyone else. He asks you to find Capt. Stern and give him the Devon Goods. When you're done, come out and you'll find that the Team M/A members have gone into the museum.
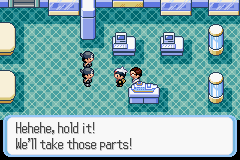 Go into the museum, and you'll be charged $50. However, I had only $4, and they still let me in. Once you're in, talk to the nearest member, and he'll give you TM46 - Thief. He'll leave. Now go upstairs, and you'll find Capt. Stern. Talk to him to give him the goods. The Team M/A members come up for the goods, and battle you. They're both quite weak, I might add. After you beat them, the leader will come to talk to you about their team. You'll then give Capt. Stern the Devon Goods, and then you're free to leave.
The city is now clear of Team M/A. In Emerald, the mysterious guy who has talked to you a few times already introduces himself as Scott, and you'll register him into yourPokeNav. Now you can head north to Route 110.
| Locations (Slateport City) |
|---|
|
 Route 110 has a new Cycling Road, but you won't be able to use it now without a Bike. Prof. Birch will come to talk to you, and you'll register him in your PokeNav. There's a little purple house here, known as the Trick House. It is a small purple house filled with many puzzles, and is managed by a balding man known as the Trick Master. This might not seem to be much of anything, but eight different items can be obtained here just by getting through the Trick Master' puzzles. There are eight puzzles in all, and you must complete one to get to the next. Below is the list of what you can get for completing each puzzle.
- 1st Puzzle: Rare Candy
- 2nd Puzzle: Timer Ball
- 3rd Puzzle: Hard Stone
- 4th Puzzle: Smoke Ball
- 5th Puzzle: TM 12 - Taunt
- 6th Puzzle: Magnet
- 7th Puzzle: PP Max
- 8th Puzzle: Blue Tent
Go west onto Route 103. There's not much to do there except battling trainers and getting some Berries/Itemballs. Come back afterwards to continue on Route 110.
| Locations (Route 110 and Cycling Road) |
|---|
|
Battle With Rival
When you come to a narrow strip of land surrounded by water on both sides, you'll meet your rival. She's very strong, so prepare yourself with some strong Pokemon. Beat her and you'll receive an Itemfinder. Afterwards, you'll battle two more trainers, and finally, you're at the next city!
Mauville: City of the Third Gym
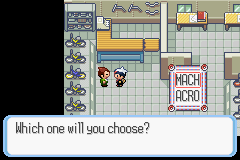 When you arrive in Mauville City, the first thing you'll want to do is to get yourself a free Bike. Go into the house to the right of the Pokemon Center, and you'll get one there by talking to the person shown in the screen shot. There are two bikes, Mach and Acro. Choose what you like after listening to the following explanation. The Mach Bike is good for speed, while the Acro Bike can do a lot of tricks. To learn more about them, read their manual at the top of the screen. With a Bike, you'll be able to move so much faster, although the Running Shoes are already quite fast. If you ever want to switch Bikes, come back to talk to him.
With your new Bike, you can now go cycling on the Seaside Cycling Road.
Also, the person in the house to the right of the Mart will give you an essential item, HM06 - Rock Smash. Teach it to one of your Pokemon, although you can't use it until after you get your third badge.
Game Corner
Mauville City has a Game Corner to play slot machines, but you'll need to get a Coin Case. Make sure you get a Harbor Mail, and talk to the girl in the house near the Game Corner. She'll give you the Coin Case for the Harbor Mail. Now you can go into the Game Corner to bet!
The slot machines are quite exciting. You can either insert one, two, or three coins. You get coins for matching three of the same kind either horizontally, diagonally, or both.
There are two roulette tables here: one with the minimum wager of one coin, and the other, three coins. On both screens, you'll be shown a screen with a four times three box. Each row has four Pokemon (Wynaut, Azurill, Skitty, and Makuhita) with three colors (orange, green, and purple). Betting on a single box will give you 12X the bet amount, a whole row would give you 3X the bet amount, and a vetical line will give you 4X the bet amount.
Mauville Gym: Shocking, Isn't It?
 The Mauville Gym has two people in front of it, one of them who's blocking the entrance. He's Wally, and he wants to battle you. He's horribly weak as he has only one lv. 16 Pokemon. After beating the him, the two go away, and you're free to enter the gym!
This is an electric gym, so be prepared with some anti-electric Pokemon. There are four trainers waiting to shock you, but show them that a little shock can't hurt a humble Pokemon Trainer like you. The electricity wall is nothing to worry about. Simply step on the lightning bolts, and the walls will move to different places to let you through.
Wattson is the gym leader here. He has a lv. 22 Magnemite, which is part Electric and part Steel type. He also has a lv. 20 Voltorb, and a lv. 23 Magneton. The Magneton is the strongest Pokemon on the old man's team. In Emerald, Wattson has an extra lv. 22 Electrike, a lv. 22 Magneton instead, and a lv. 24 Manectric as his strongest Pokemon. For winning, you get the Dynamo Badge and TM34 - Shock Wave. The badge gives you the ability to use Rock Smash outside of battle, and will raise the Speed of your Pokemon.
After getting what you came here for, you can head west onto Route 117.
 At the very beginning of Route 117, there's a Daycare Center. If you wish, you may go into the center and leave up to two Pokemon with the old lady. By leaving your Pokemon there, they'll raise levels automatically. The lower the level of the Pokemon, the faster the levels will gain. As the Pokemon gain levels, it is possible that a new move will be learned and an old move will be erased. Of course, money is involved. Whenever you want to pick up your Pokemon, the old lady charges $100 for each level gained.
After leaving a Pokemon in the Daycare Center, you can go on. Route 117 is pretty straight foward and short; just keep going west. Most of the people here are pacing around. On this route, you can have a two-on-two battle with two girls standing near the Berry trees. Real soon, you'll arrive in Verdanturf Town.
| Locations (Route 117) |
|---|
|
Rusturf Tunnel
 When you arrive in Verdanturf Town, you'll want to first heal your Pokemon, and then go into the cave at the top of the town. Battle the single trainer, and go all the way north. Smash the rock to talk to the person inside. He'll give you HM04 - Strength, and will leave with the woman. Teach the TM to a Pokemon, even though you won't be needing it for a while.
Go west, and come out on Route 116. Talk to the green guy, and he'll give you a Repeat Ball. Get back into the cave, and get back to Verdanturf Town.
| Locations (Rusturf Tunnel) |
|---|
|
Contest House
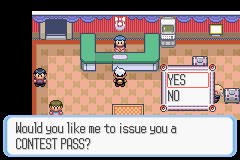 There isn't much to do in Verdanturf Town. Well, of course, you'll notice a fancy building, just like the one in a previous city. It's the Contest House! In order to enter, first go inside and talk to the counter-lady. She'll give you a Contest Pass. Afterwards, if you want to enter right now, just say "Yes". Choose a Pokemon you want to enter with, and take you to a place full of trainers and spectators. In the upper-right hand corner is a lady who will give you TM45 - Attract.
This Contest House is replaced in Emerald with a Battle Tent like the one in Slateport City. Now you'll need to leave, and head to the next city. In order to do that, go back to Mauville City, and head up to Route 111.
Route 111 is a path with many stairs, and many dangers. One of the so called dangers is at a peaceful little house at the near beginning of the route. A man is standing outside. Talk to him, and he'll battle you. After you beat him, you'd think about leaving, right? No! All of his family members come out one by one to battle you, and you won't be given any time to heal your Pokemon. After you battle all four of them, go inside and talk to the mother on the upper-right hand corner. She'll give you aMacho Brace.
Fiery Path
Smash the rocks, and you might want to have a two-on-two battle with the video crew. Eventually, you'll reach a desert with a raging sand storm. You won't be able to get through though, so go west onto Route 112. You'll soon reach a cave with steam spouting everywhere. You won't be able to push the rock you see in the cave until you get your next badge. So go straight, and come out the other side.
| Locations (Fiery Path) |
|---|
|
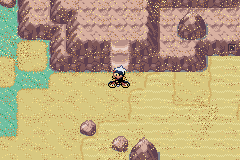 You're on the other side of the desert. Go up the mountain. You can only do so on a Bike, since the road is slippery. There are two ways to get onto the mountain, one north and one south. Battle the Blackbelt on top. There's a rest stop there that'll heal your Pokemon. On this part of Route 111, you'll see a guy facing the trees. Talk to him, and he'll give you TM43 - Secret Power. Teach this to a Pokemon, and it'll allow you to make Secret Bases either in large-size trees or in mountains and caves. At the top of the route is a little girl who'll give you a Berry.
| Locations (Route 111 and Desert) |
|---|
|
| Locations (Route 112) |
|---|
|
It's Ashing!
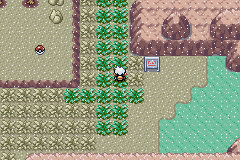 You'll eventually go onto Route 113. It appears that volcanic ash is floating on this route. As you walk past the ground, the grass turns gray as it is covered with ash. You'll notice bumps on the ground. They turn out to be items! Watch out for the trainers hiding in the ash too!
As you're traveling on Route 113 you'll notice a little house. Go in there, talk to the man, and he'll give you a Soot Sack. You see, this person makes glass out of ash. He tells you to collect ash with this item, and then see him when you have enough. After walking 243 steps in the ashes, you can go to him to obtain a Blue Flute, a item that awakens sleeping Pokemon. To the left of the house is yet another little bump. This bump contains TM32 - Double Team, so it would be a good idea to get that. After a long trek, you'll find civilization in Fallarbor Town.
| Locations (Route 113) |
|---|
|
Kinda Small
 Fallarbor Town is yet another small town with nothing much to do except healing your Pokemon and buying more supplies. In the Pokemon Center, there's a lady using the computer. She's Lanette, inventer of the Pokemon Storage System. Talk to her and she'll go away. The only thing worth doing in this city is visiting the Contest House (of course, in Emerald, this is another Battle Tent). In Emerald, a lady in the PokeMart can teach one of your Pokemon Metronome for free. Since there's nothing more to do, we shall go on!
Simply go west a little bit from Fallarbor Town, and you'll arrive on Route 114. Go into the first house you see. Talk to the little kid, and he'll give you TM28 - Dig. This TM is a built-in Escape Rope! The house also leads into a cave. A man is deep inside. Talk to him, and he'll tell you that the sandstorm might have raised some fossils on Route 111. Now leave the house, and continue westward.
| Locations (Route 114) |
|---|
|
There's an old man standing next to his Poochyena. Talk to him and he'll give you TM05 - Roar. Go south onto the bridge, and battle the Fishermen. Next to the two girls is a person who'll give you a Razz Berry if you talk to him. The above house belongs to Lanette. Go in there and talk to her for a Lotad Doll, an item for decorations. Now go up the mountain, smash the rocks, and get the item. Battle all the trainers on top of the mountain to get through. The end of the mountain path isMeteor Falls. Go inside and check out what's happening.
Team Aqua and Magma Disputing
 Get the Itemball and cross the bridge. You'll watch a little dispute between Team Magma and Aqua. Team M/A (one of them) has the Meteorite, and plans to do something with it on Mt. Chimney. They'll talk to you, but won't battle you. After they debate, they'll leave, leaving only the Scientist here. Go west a bit in the cave, and go up the stairs. There, you'll find a Moon Stone. If you come out the other side of the cave, you'll arrive at Route 115. There's really nothing here except battling trainers and catching Pokemon, so you might want to come out the cave on the side you came in. Otherwise, if you get stuck, go through Rustboro City and Route 116. Go into Rusturf Tunnel, and come out the other side.
| Locations (Meteor Falls) |
|---|
|
| Locations (Route 115) |
|---|
|
Either you go backwards or through the other side of the tunnel, where you want to go is Route 112. There's a Cable Car there. It used to be blocked by Team M/A, but they've left. Now take the Cable Car up the mountains.
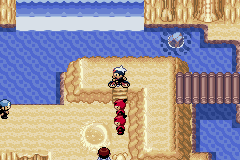
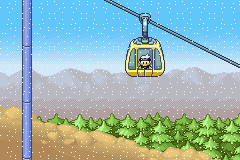 Going up the mountain is really great to watch. You'll arrive on Mt. Chimney, where you'll meet a ton of Team M/A members. Go north and battle those bad guys. At the northern-most part of the mountain, talk to the person next to the machine that holds the Meteorite. He'll battle you. He has three Pokemon, and they're pretty strong. After beating him, he'll go away. Get the Meteorite afterwards.
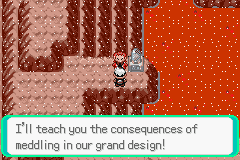 After you've done your work with the bad guys, they'll go away. If you ever choose to come back to this mountain, there will be trainers here instead. To get off the mountain, don't go back onto the Cable Car. Instead, go south onto Jagged Pass. After battling a few trainers, you'll arrive at Lavaridge Town.
| Locations (Jagged Pass) |
|---|
|
Hot Springs
Lavaridge Town is a small, but cool place. You can go into the Pokemon Center and go through the back door to enjoy a dip in the hot spring. Outside, people are buried in hot sand. The old lady above the old man will give you an egg that contains a Wynaut. Next to the gym is a store. Go inside and talk to the old man wearing purple. He'll give you a Charcoal. Afterwards, head for the gym.
A Hole Here and a Hole There
 The Lavaridge Gym is full of little hot spring holes. What you need to do is go through all the holes and try to end up with the gym leader, which could be frustrating to do. This is something like Sabrina's gym in previous games, except this time if you go up to a wrong hole, you'll need to face a trainer. Follow the steps below only if you don't want to battle any trainers.
In the first room, the pool on the left goes to the next area. In the next area go into the only other pool. After that, enter the pool at the upper-left hand corner. Go to the only other pool. Then go to the pool to your left, then to the upper-right. After, that, take the only other pool, and then the lower-right. Go down to the single pool, and finally you'll meet the gym leader. Note that in Emerald, the layout is a bit different from the one described here.
The gym leader is Flannery. She, like everyone else in the gym, uses Fire Pokemon. She has two Slugma, and one hot Torkoal! In Emerald, she has one Numel, one Slugma, one Camerupt, and a Torkoal. After you defeat her, she'll give you TM50 - Overheat and the Heat Badge. Now all Pokemon up to level 50 will obey you, and Strength is allowed outside of battle. When you get out of the gym, your rival will talk to you and give you the Go-Goggles. With these goggles, you'll be able to get through the deserts without any problems.
Fossil Finding
Before you do anything else, go deep into the desert, and I mean all the way north. There, you'll find two fossils. One is the Root Fossil, and the other is the Claw Fossil. You may only pick one, as the other one will sink back into the sand. At the very south of this sandstorm section, you'll find TM37 - Sandstorm.
Now it's time to go all the way back to Petalburg City to challenge your father to a gym battle. During your journey, you're probably going to go through Rusturf Tunnelagain. Go west and south, and you'll come to to a place where a Nerd says that he lost his glasses. Look around, and you'll find a pair of Blackglasses. You'll have to look hard, because it's hidden.
Your Father's Gym
 Finally, you've reached the gym leader, better known to yourself as "Dad." To other people, he's Norman. Like the rest of the gym, he uses Normal Pokemon. He has a lv. 28 Slaking, a lv. 30 Vigoroth, and another Slaking. This one, however, is lv. 31, and quite hard to knock out. In Emerald, Norman has a lv. 27 Spinda, a lv. 27 Vigoroth, a lv. 29 Linoone, and a lv. 31 Slaking.
After you defeat him, he'll award you with TM42 - Facade and the Balance Badge. With this badge, all of your Pokemon's Defense will rise, and you'll be able to use Surf outside of battle. He also tells you that Wally's parents want to see you.
So now it's time to go to Wally's house, which is right next door to the gym. Talk to his father, and he'll give you HM03 - Surf. In Emerald, you'll be taken to Wally's house automatically. Now you can cross the oceans without a boat!
 Now you must go east and travel all the way to Mauville City! Talk to the gym leader, and he'll give you a Basement Key. He needs you to go to New Mauville to switch off a Generator. New Mauville is basically the Power Plant of Hoenn. This place is "a short Surf away from Route 110." So now get into the water, and head east. Soon, you'll reach an island with a cave. Go in there, and you'll be at New Mauville.
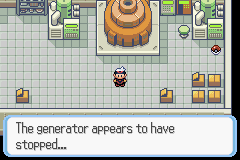
Use the Basement Key to open the door. When you get inside, step on the blue switch so the other door can open. Afterwards, you'll need to step on many switches to get through. When you finally get to the Generator, simply step on the red switch, and it'll turn off. Close by the Generator is the Thunderstone! Now go back to talk to the gym leader. He'll give youTM24 - Thunderbolt for your trouble.
| Locations (New Mauville) |
|---|
|
When you get to Route 118, surf east to get to the next city. You'll reach the beach, and you'll meet those two interviewers again. You can battle them if you want to. Keep on walking, and Steven will pop out to talk to you. His short talk with you won't affect you in any way, though.
 Now you must go north to Route 119. Here, you'll find a lot of tall grasses, which you cannot get through on Bike. You'll find a lot of trainers hidden here searching for Bug Pokemon. The screenshot to your left shows you a hidden item that can be found. Right when you get out of the tall grasses, surf to the piece of land to your left to find a Zinc. Continue north, and soon you'll reach a weather institute, closely guarded by Team M/A.
| Locations (Route 118) |
|---|
|
| Locations (Route 119) |
|---|
|
Weather Institute
 Go inside the building, and go upstairs. As you do so, you'll be battling many Team M/A members. The final battle is with the Admin of the team. After you beat her, the scientist will come out to talk to you, and give you a Pokemon called Castform. This Pokemon is special, because if it rains in battle, it changes its physical appearance. It's holding a Mystic Water, too. Now you can leave and go on.
Another Fight With Your Rival
Walk a little, and your rival will come out to battle you. Her Pokemon isn't totally tough to beat at all. For beating her, she'll give you one of the best HMs in the world of Pokemon: HM02 - Fly. Teach this to one of your Pokemon, and they can fly to any city that you've been to before. It definitely saves a lot of walking or bicycling. But before you can use this, you must get the badge from Fortree City, and that's where we're about to arrive at!
The Treetop City
Here at Fortree City, everyone lives in a treehouse. In the house next to the Pokemon Center, a girl would like to trade her Skitty for your Pikachu, if you have one, that is. Now go out from that house to the next house. There's an old lady inside, and asks you to guess which hand does she have a coin. She'll ask three times, and it goes like this: right, right, left. After that, she'll give you TM10 - Hidden Power. Southeast of the city is a store in which you can buy decorations that are directly sent to your PC. There is something invisible blocking the gym, so you won't be able to get in.
Go to Route 120 now and go south. There is a hidden Revive in the tall grass. Cross the bridge, and you'll see Steven. After a battle with his Kecleon, he'll give you theDevon Scope. It alows you to see any unseeable Pokemon. Now go back to the gym, and press "A" to the place where you can't get in. The Devon Scope is automatically used, and you'll see a Kecleon getting away. Finally, you can get into the gym!
Come Fly With Me
 This is a Flying Pokemon gym, and there are many rotating doors that you must get through, and they're pretty confusing. From the start, go right, and battle the trainer. Continue right, and you'll meet up with another trainer. Next, move one step to the left and one step down. Go up, and move the door on the right counterclockwise. Then move the door on the left counterclockwise. Then get through from the door on the right. When you get through, go up, battle the trainer, and continue upwards. After fighting the trainer move 1 space to the left and 6 spaces up. To solve to puzzle move 7 spaces to the right, 2 spaces up, 3 spaces right, 1 space up, 1 space left, 1 space down and 2 spaces right. You still need to walk 2 spaces up to fight the next trainer. Next move around the wall then go straight down. Move around the next wall and back up. Finally you meet the gym leader.
She's called Winona. She has a lv. 31 Swellow, a lv. 32 Skarmory, a lv. 30 Pelipper, and a lv. 33 Altaria. The Altaria is very strong, so watch out! After beating Winona, she'll give you TM40 - Aerial Ace and the Feather Badge. Now all Pokemon up to lv. 70 will obey you. This badge also allows you to use Fly outside of battle. Now get out of the gym, and fly to Littleroot Town. There, talk to your mom, and she'll give you an Amulet Coin, which doubles the money you attach it to a Pokemon that takes part in a battle. Fly back to Fortree City, and continue on to Route 120.
 Once you get onto Route 120, you'll see an Itemball in the tall grasses. An invisible Kecleon is blocking it. After capturing/defeating it, you can get the item, which turns out to be a Nest Ball. As you travel on this route, it'll start raining. The sky gets darker, and the rain just starts falling. All battles from now on will have Rain Dance's effects. On the second area of tall grasses, another Kecleon remains invisible until you press "A" against it. After you reach the second bridge, the rain stops, and you can see reflections of the clouds in the water.
Go on, and you'll reach Route 121. At the middle of this route, you'll see a few Team M/A members saying they're going to go to Mt. Pyre. There are two trainers together here, so you can have a two on two battle. Above them is the Safari Zone. However, without a PokeBlock Case, you won't be able to get in. At the end of the route is Lilycove City.
| Locations (Route 120) |
|---|
|
| Locations (Route 121) |
|---|
|
No comments:
Post a Comment